
Retentions & Deletions Periods
Every data protection framework — GDPR, LGPD, FADP and beyond — requires you to prove that personal data is not kept longer than necessary. In practice, that means having a clear, consistent, and auditable list of every retention and deletion rule your organisation follows. The Retention & Deletion Periods module is where that list lives in DPMS. Rather than maintaining a separate spreadsheet that drifts out of sync with your ROPA or asset inventory, you maintain one register here and every other module in DPMS pulls from it. When a ROPA record asks "how long do you keep this data?", the answer comes from a structured entry you created here — complete with a legal reference, a trigger date, and a version history.
This screen is used by DPOs and compliance officers who are building or maintaining the register, by risk managers who need to verify that retention practices are legally defensible, and by auditors who need to trace exactly when a rule was changed and by whom.
How to open it
In the left sidebar, go to the Compliance section and click Retention & Deletion Periods. The menu item sits in the same cluster as ROPA and Legitimate Interests.
You need at least read permission for Retention & Deletion Periods to see the list. Without it, the screen shows a "Forbidden" error page. To create new records you need create permission; to edit existing ones you need edit permission; and to import from a JSON file you need import permission. If you can see the module but cannot create or edit entries, ask your DPMS administrator to review your role.
What you see
The screen opens on the index view: a full-width table of all your retention and deletion period records. Above the table, a row of status tabs — All, Active, Draft, Inactive, and Review — lets you filter the list to whichever lifecycle stage you care about right now. To the right of those tabs sits a search box and export buttons for JSON and Excel.
The table itself has five columns: Name (the human-readable label you gave the record), Duration (for example "5 Years" or "Indefinite"), Period Type (Retention or Deletion), Country, and Legal Reference (truncated, with an external link icon when a source URL is available). Click any row to open the full detail view for that record.
In the upper-right corner of the list, the blue Create button opens a small dropdown. Depending on your configuration you will see one or two options: creating a period manually, and — if your organisation has activated the Filerskeeper integration — importing directly from a statutory obligations database.
Working with this screen
Building your retention register from scratch
To create a new record, click Create → Create Retention & Deletion Period. The creation form opens.
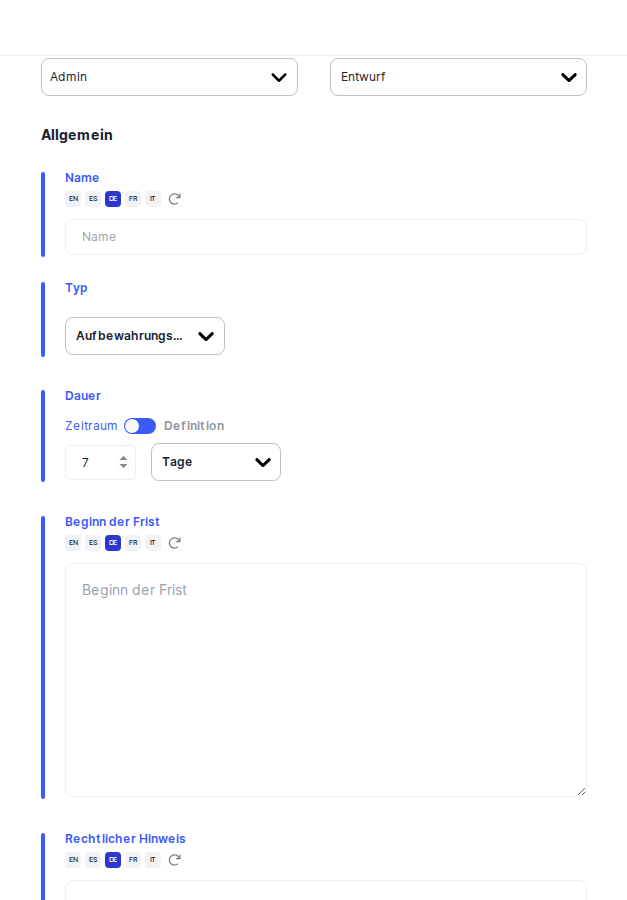
Start at the top of the form by setting the status (the badge in the upper left). Most teams begin with Draft and move to Active once the period has been legally reviewed and signed off. Then assign yourself or a colleague as the Responsible Person — this determines who sees the record when "read only on assigned" permissions are in play.
Next, type a clear Name for the period — something like "Employee personnel files — labour law." If your DPMS instance supports multiple languages, click the translation helper button next to the name field to request automatic translation into your other active languages. This matters because the name will appear on ROPA records and asset profiles throughout the system.
Choose the Period Type: select Retention if this rule defines how long data must be kept, or Deletion if it defines the moment at which data must be removed or anonymised.
The Duration field has two modes, controlled by a toggle:
- Timeframe (the default): type a number into the numeric box and choose a unit — Days, Weeks, Months, or Years. Use this for concrete statutory periods such as "7 Years."
- Definition: flip the toggle to select Unspecified, Indefinite, or Permanent. Use this when a fixed period cannot be stated — for example, data that must be kept "until further notice" or data that can never be deleted.
Heads up: Switching between Timeframe and Definition mode silently resets whatever you had entered back to the default value. If you accidentally flip the toggle, you will need to re-enter your number or re-select your definition. There is no undo prompt.
In the Period Start field, describe the event that starts the clock — for instance "from the date the employment relationship ends" or "from the date of the last transaction." This field is not hard-required, but leaving it blank makes your retention schedule legally incomplete and harder to defend in an audit.
Finally, fill in the Legal Reference: cite the specific law, regulation article, or internal policy that mandates this period. For Filerskeeper-imported records this field is pre-populated and carries a clickable link to the original legal text.
When you are satisfied, click Save. DPMS creates the record and takes you straight to the detail view, where you can link assets, tasks, and assessments to it.
Importing obligations from the Filerskeeper database
If your organisation has enabled the Filerskeeper integration in IT Settings, you can bypass manual entry entirely for statutory obligations. Click Create → Create from database.
On the database screen, start with the Select Country dropdown. Once you pick a country — say, Germany — the Select Category dropdown becomes active. Choose a category such as Tax & Finance, and then pick a Select Subcategory such as Accounting Documents. DPMS queries the Filerskeeper service and populates a results table with matching statutory obligations.
Browse the table — it shows the category, record type, duration, period type, and legal reference for each obligation. Tick the checkboxes on the rows you want to import; note that you must select rows one by one, as there is no "select all" checkbox. When you are done, click Save. DPMS creates one new record for each obligation you selected and takes you to the detail view of the first.
Tip: Filerskeeper obligations are imported with an English name only. If your organisation operates in multiple languages, open each imported record and use the translation helper to generate names in your other active languages — this will not happen automatically.
Reviewing and editing an existing period
Click any row in the index to open the detail view. The sticky header at the top shows the record's status badge, responsible person(s), last-updated date, and the date of the most recently completed review workflow — all visible at a glance without scrolling.
The left-hand menu gives you five tabs: General, Assets, Tasks, Assessments, and Workflows. The General tab is where the core fields live in read-only mode.
To make changes, click the three-dot menu in the upper-right and select Edit, or click the Edit button inside the General tab. This takes you to the edit form at /retentions/deletions/:id/edit, where all the same fields are available.
To change just the status — for example to move a period from Review back to Active after you have confirmed it is still legally current — click the status badge directly in the sticky header. A dropdown appears and you can update the status in one click without opening the full edit form.
Checking the audit trail
Any time you need to verify when a field was changed and by whom — for instance, confirming that a retention period was extended from 5 years to 7 years ahead of a regulatory inquiry — open the record's detail view and look for the clock icon in the upper right.
Heads up: The Activity Log (change history) for Retention & Deletion Periods is not yet active in the current release. The clock icon does not appear on these records. If you need a documented audit trail, use workflow comment fields or the notes functionality until this feature is enabled.
Linking retention periods to assessments, assets, and tasks
Once a record is saved and set to Active, it becomes available as a selectable option in other parts of DPMS. Open the detail view and click the Assessments tab to see every ROPA or data-mapping assessment that references this period. The Assets tab shows every asset that carries this period in its retention attribute. The Tasks tab lists any compliance tasks linked to it.
From any of these tabs you can click through to the linked object to see it in context — useful when an auditor needs to trace exactly where a specific retention rule is applied across the organisation.
Field reference
- Name — The human-readable identifier for the period. Required. Supports multiple languages; use the translation helper to fill in other locales.
- Period Type — Retention (keep data for this long) or Deletion (remove data at this point). Required for clarity, though the form will save without it.
- Duration (Timeframe mode) — A positive number plus a unit (Days, Weeks, Months, Years). If you clear the number field and save, DPMS will silently set it to 1. Always double-check before saving.
- Duration (Definition mode) — Choose Unspecified (not yet known), Indefinite (until a condition is met), or Permanent (never delete). Switching to this mode clears any number you had entered.
- Period Start — A free-text description of the trigger event. Not hard-required but essential for a legally complete schedule.
- Legal Reference — The law, regulation, or policy that mandates this period. For Filerskeeper records, this is pre-filled and linked to the source. Supports multiple languages.
How this connects to the rest of DPMS
Entries in the Retention & Deletion Periods register do not sit in isolation — they are the backbone of several other compliance activities.
ROPA records depend on this register. When a Data Protection Officer completes a Record of Processing Activity and fills in how long data is kept, they select a structured period from this module. Without entries here, ROPA forms cannot reference a consistent, auditable retention definition and must fall back to free text — making bulk reporting and consistency checks impossible.
Asset records can carry a retention period attribute. Once you have created a period here and set it to Active, it appears as a selectable option when editing an asset's general details, ensuring that every asset's data lifecycle is tied to a defined, legally grounded rule.
Workflows can be triggered on individual retention periods — for example, an annual review workflow that sends the record to a DPO for revalidation. Check the Workflows tab in the detail view to see whether a workflow has been configured for the record.
The organisation library (sharing): if your organisation has a parent/child company structure in DPMS, you can publish retention periods to the shared library using the Sharing option in the three-dot menu. This lets subsidiary companies inherit centrally managed retention rules without recreating them.
After building your register, the next step is typically to link these periods to your ROPA records and asset entries. Consider also triggering a review workflow for any period you classify as Active to ensure it is revalidated periodically.
Tips & common pitfalls
Heads up: Toggling between Timeframe and Definition mode in the Duration field resets your previously entered value with no warning. Only flip the toggle when you are sure you want to change the mode — and be prepared to re-enter your value.
Tip: When importing from Filerskeeper, select only the rows you are confident apply to your organisation. Each selected row becomes a separate record in DPMS. You can always come back and import more, but cleaning up unwanted records takes time.
- Empty Duration becomes "1 Days." If you clear the numeric amount field before saving, DPMS silently resets it to 1 Day. Review the Duration field on the detail view after saving to confirm what was stored.
- Search works on the default language. The search box matches against the record name in the default language. If you have entered a period name only in German and your default language is English, a search in German may return no results. Ensure names are translated into the default language.
- "Read only on assigned" users see a filtered list. If a colleague reports that a period is missing from their list, check that they are listed as a Responsible Person on that record. Users with restricted read permission only see records they are assigned to.
- Navigating between records with the breadcrumb arrows resets your tab. If you were viewing the Workflows tab and click the chevron to jump to the next record, you will land on that record's General tab. You will need to click back to Workflows manually.
- Status changes in the sticky header are instant. There is no confirmation step when you click the status badge and select a new status — the PATCH fires immediately. Double-check before you change a status, especially when moving a period back from Active to Draft.