
Create a new project
Creating a New Project
The Create a new project screen is the starting point for any compliance or data-protection initiative you want to formally manage in DPMS. Whether you are implementing a new technical or organisational measure (TOM), responding to an audit finding, or rolling out a GDPR-compliant process, a project gives that work a proper lifecycle — from an initial draft through active execution to completion. Data Protection Officers, compliance managers, and IT administrators typically land here when they need to bring structure to work that would otherwise be scattered across unconnected tasks and notes.
How to open it
Navigate to Projects in the main sidebar. In the top-right corner of the Projects index page, click the animated Create icon button. A small dropdown appears — select Create from it. You will land directly on the creation form.
Heads up: You need the Create Projects permission to access this screen. Users with edit-level permissions on projects can also reach it. If you lack the necessary permission, DPMS shows a "Forbidden" page immediately — contact your system administrator if you believe you should have access.
What you see
The screen is divided into two main areas. On the left is a narrow vertical tab menu listing every project section: General, Cost & Impact, Tasks, Steps & Progress, People, RASCI, Assessments, Meetings & Activities, Manage Access, Workflow, and several others related to risk and standards. All of these tabs are greyed out and locked — you cannot click them yet. Only the General tab is active. This is intentional: DPMS cannot link tasks, people, RASCI roles, or risk scenarios to a project that does not yet exist in the system. Saving the General form is what creates the project record and unlocks all the other tabs.
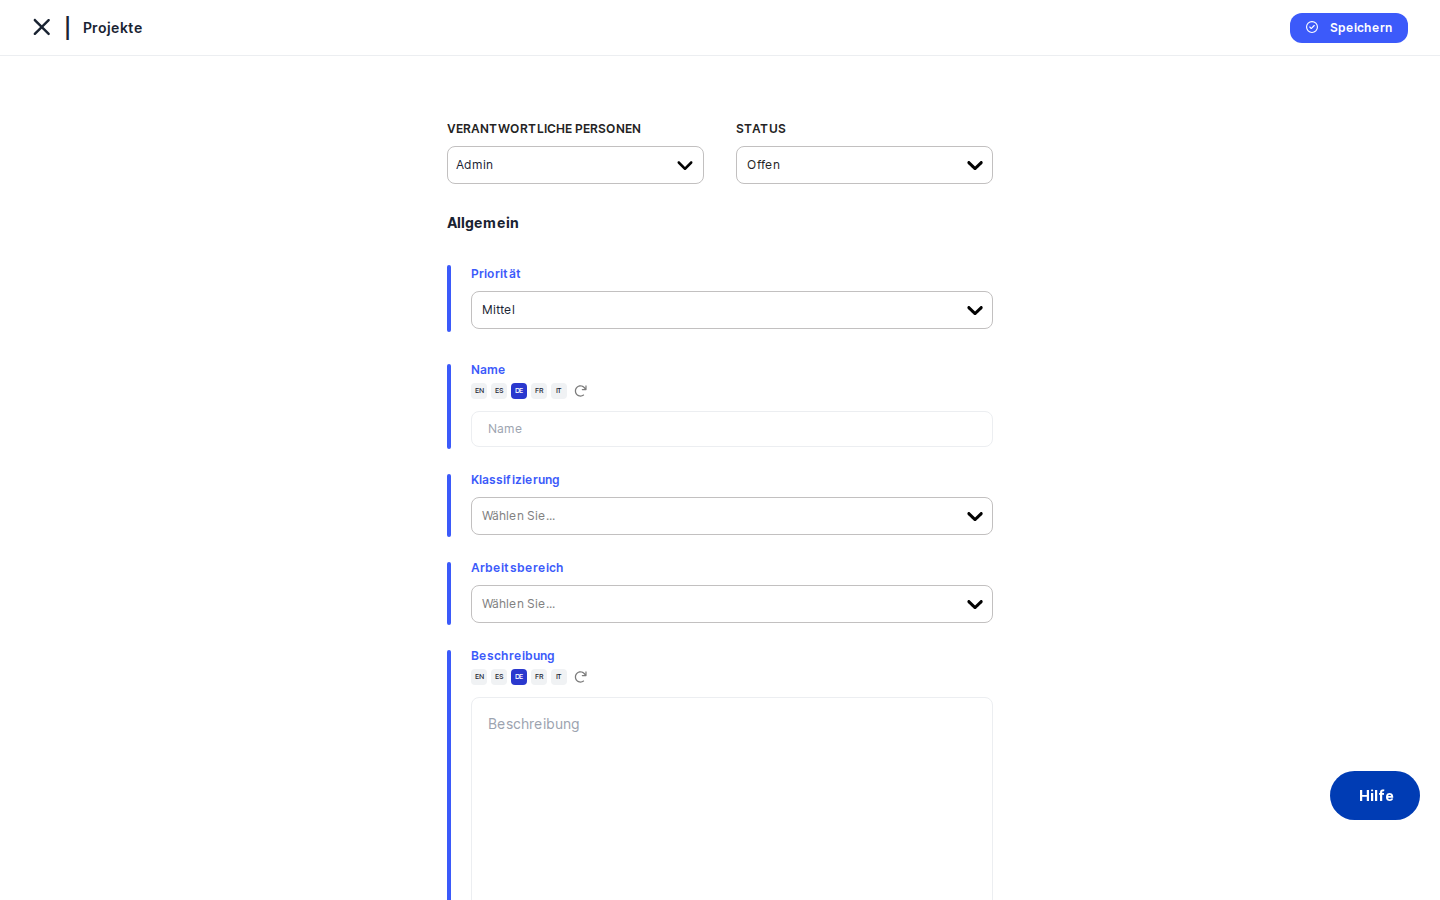
The right-hand side shows the General form itself. At the very top is a horizontal action bar containing quick-access controls for the responsible persons, status, and priority. Below that, the main form fields appear in a single-column layout, each with a label and, for text-heavy fields, a language translation helper icon. At the bottom-right of the form is the Save button, which submits everything you have entered.
Working with this screen
Setting up a new project for the first time
Start at the action bar at the top of the form. Use the Status dropdown to set where the project sits in its lifecycle right now — for a project you are still planning, "Draft" is the right choice. Next, click the Priority selector and choose from Low, Medium, High, or Critical to indicate how urgent this initiative is relative to others in your compliance portfolio. Then use the Responsible Persons selector to assign one or more internal team members who will own the project; note that external users are not shown in this list by design.
Move down to the Name field and type a clear, descriptive title. The name is the most important thing you enter here — it is how the project will appear in lists, reports, and linked records across DPMS. If your organisation works in multiple languages, click the translation helper icon next to the field to enter or generate the name in other supported languages at the same time.
Fill in the Classification multi-select to tag the project with the appropriate category (for example, "GDPR" or "ISO 27001"). Then choose a Domain to indicate which part of the business this project belongs to (for example, "HR" or "IT"). In the Description field, write a summary of what the project is trying to achieve and why. Again, the translation helper is available if you need to enter the description in multiple languages.
Use the Applicable Regulation field to link the project to the legal frameworks it addresses. This field searches the backend as you type — enter an acronym such as "GDPR" or "nDSG" and matching regulations will appear. Select as many as are relevant.
The Workstream field lets you associate the project with one or more operational compliance streams (for example, "Consent Management" or "Data Minimisation"). This supports workstream-level reporting later.
The remaining text fields — Benefits, Assumptions, Deliverables, Resource, Involvement, and Tangible Ambition — are all optional at this stage, but filling them in now will save time later. Use them to document what the project is expected to deliver, what it depends on, who needs to be involved, and what "done" looks like in concrete terms.
When you are ready, click Save at the bottom-right of the form. DPMS creates the project record in the database and immediately redirects you to the project's detail page. Every previously locked tab is now accessible.
Switching to a different status or priority after the fact
If you realise you have set the wrong status or priority before clicking Save, simply click the control again and choose a different value. Nothing is persisted until you click Save, so you can change any field freely while still on the creation form.
Once you have been redirected to the detail page, look for the edit (pencil) icon to return to the form in edit mode. All your changes there are submitted with the Save button on the relevant tab.
Creating a multilingual project for an international team
If your organisation runs DPMS in multiple languages, you can prepare multilingual content right from the creation screen. For the Name, Description, Benefits, Deliverables, and other text fields, click the small translation helper icon that appears alongside the field. A panel opens where you can type (or generate via AI-assisted translation) the content in each active language. When you save the project, DPMS stores all language versions together. Colleagues whose interface is set to German will automatically see the German version of the project name and description wherever it appears.
Skipping Save and trying to open a locked tab
You may be tempted to click over to the RASCI or People tab before saving — perhaps to check what options are available. Those tabs are locked until the project has been saved for the first time. Clicking them does nothing. The only way to unlock them is to fill in at least the essential fields on the General tab and click Save. Once the project record exists, all tabs open immediately on the detail page.
Field reference
- Responsible Persons — The team members who own or co-own the project. Select one or more internal users. Only internal accounts appear in this list; external user accounts are excluded automatically.
- Status — The project's current lifecycle stage (for example, Draft, Active, Review). A system default is applied automatically if you leave this unchanged. Custom statuses created by your administrator also appear here.
- Priority — Urgency level: Low, Medium, High, or Critical. Optional — leaving it blank is valid.
- Name — The project title. While not hard-validated by the form, every downstream view relies on this field to identify the project. Always provide a meaningful name. Supports multiple languages via the translation helper.
- Classification — One or more category tags (for example, "GDPR", "ISO 27001"). Options come from tags pre-configured in Compliance Settings → Tags. If the dropdown is empty, ask your administrator to create classification tags first.
- Domain — A single business domain tag (for example, "HR", "IT"). Single-select. Options come from domain tags in Compliance Settings. Empty if not yet configured.
- Description — A free-form summary of the project's purpose, scope, and background. Optional but strongly recommended. Supports multiple languages.
- Applicable Regulation — One or more legal frameworks this project addresses (for example, GDPR, Swiss nDSG). This field queries the backend as you type; it does not load a local dropdown. If no results appear, check that regulations have been imported in Compliance Settings.
- Workstream — One or more compliance workstream tags. Optional. Enables workstream-level reporting. Options come from Compliance Settings → Tags.
- Benefits — Expected business or compliance benefits. Optional. Supports multiple languages.
- Assumptions — Preconditions the project relies on. Optional.
- Deliverables — Concrete outputs the project will produce. Optional.
- Resource — Human, financial, or technical resources required. Optional.
- Involvement — External stakeholders or parties who need to be engaged. Optional.
- Tangible Ambition — A measurable definition of project success. Optional.
How this connects to the rest of DPMS
Creating a project is the prerequisite for almost every other project-related activity in DPMS. Once the record exists, the following capabilities become available on the project's detail page:
- People tab — Assign team members to specific project roles. This is the right place to start after the initial save, because the RASCI matrix depends on people being assigned first.
- RASCI tab — Configure the Responsible, Accountable, Support, Consulted, and Informed matrix across project activities. Available only after project creation and only meaningful once roles and people have been configured.
- Tasks tab — Link existing tasks to the project, or create new ones. The Steps & Progress tab then aggregates workload and progress data from these linked tasks.
- Assessments and Meetings tabs — Attach assessments (for example, DPIAs) and meeting records to the project for a full audit trail.
- Cost & Impact tab — Document estimated cost, current risk rating, target risk rating, likelihood, and impact.
- Standards, Risk Scenarios, and Treatment Plans tabs — These risk evaluation tabs become available after the project is saved. However, meaningful risk work requires you to first associate at least one risk standard via the Standards tab. Treatment plans, Suggested TOMs, and Implemented TOMs all follow from that.
- Workflow tab — Trigger automated compliance workflows against the project (requires the assign-workflow permission).
After creating the project, the recommended next step is to open the People tab and assign your team, then move to RASCI to define accountability, and finally to Cost & Impact to document the financial and risk context before sharing the project with stakeholders.
Tips & common pitfalls
Heads up: All tabs except General are locked until you clickSave. This is the single most common source of confusion for new users. You cannot pre-fill RASCI, People, or Tasks before the project record exists. ClickSavefirst, then enrich the project through the detail page.
Tip: Give the project a meaningful name before saving. The form does not enforce a non-empty name, so you can technically save a nameless project — but it will appear blank in every list and linked record across DPMS, making it very hard to find later.
- Classification and Workstream dropdowns appear empty? This means the relevant tag types have not been created yet in Compliance Settings → Tags. Ask your compliance administrator to set up classification and workstream tags before you return to create the project.
- Applicable Regulation search returns nothing? Unlike Classification, this field queries the backend each time you type rather than loading a local list. Try searching by acronym (for example, "GDPR" or "CCPA"). If results are still missing, the regulations may not have been imported into your DPMS instance — check with your administrator.
- After clicking
Saveyou are taken away from the creation form permanently. The redirect to the project detail page is automatic and immediate. To continue editing, use the edit (pencil) icon on the detail view. There is no option to stay on the creation form after saving. - Responsible Persons does not show an external consultant or partner. The picker automatically excludes external user accounts. Only internal team members can be assigned as responsible persons here. RASCI assignments on the detail page offer more flexibility for documenting external involvement.
- Unsaved changes may survive minor navigation events (such as briefly switching away and back within the same session), but they will be lost if you close the browser or navigate to a completely different part of the application. Save early and often.