
Edit a vendor
Edit a Vendor
The vendor edit screen is the central workspace for keeping a vendor record accurate, complete, and audit-ready. DPOs, compliance officers, IT administrators, and risk managers come here whenever they need to update a vendor's contact details, assign criticality ratings, document data transfer legal bases, link assessments or tasks, manage access controls, or run a risk evaluation workflow. Because vendor records feed directly into ROPAs, risk dashboards, assessments, and compliance reports, keeping them current is not just good housekeeping — it is a regulatory obligation.
How to open it
- In the main sidebar, click Vendors.
- On the vendor list, click any vendor row to open its detail view.
- In the detail view, click the pencil icon in the top-right corner of any section card (for example, General or Criticality) — this takes you straight to the corresponding tab on the edit screen.
- Alternatively, use the three-dot menu on a vendor row in the list and choose Edit.
You need at least one of the following permissions to edit a vendor: the standard vendor edit permission, the "own assigned vendors" edit permission, or the vendor create permission. The Trigger Workflow tab requires an additional workflow permission. If you don't have the right access, DPMS shows a "403 Forbidden" page instead of the form. Contact your system administrator if you believe you should have access.
What you see
When the screen opens, the layout is divided into two main areas. On the left is a vertical tree menu listing every available tab for this vendor record — from General and Criticality at the top, through linked-object tabs like Tasks, Assessments, and Documents, down to a full suite of risk evaluation tabs including Standards, Threshold, Risk Scenarios, Treatment Plan, and more. Clicking any item in this tree switches the content panel on the right without reloading the page.
At the very top of the content area is a breadcrumb bar showing Vendors › [Vendor Name] › [Current Tab], so you always know where you are. The breadcrumb also contains left and right chevron arrows that let you jump directly to the previous or next vendor in your current filtered list — a handy shortcut when you are working through a batch of vendors one by one.
The sticky header at the top of the content panel remains visible as you scroll. It shows the vendor's Responsible Person selector and Status dropdown, which are always accessible regardless of which tab you are on. In the top-right corner you will find a clock icon (for the change log) and a three-dot options menu (for sharing settings). The content area below the header changes entirely depending on the active tab: edit tabs show labelled form fields, while linked-object tabs show searchable tables with checkboxes and action buttons.
Working with this screen
Updating general information and contact details
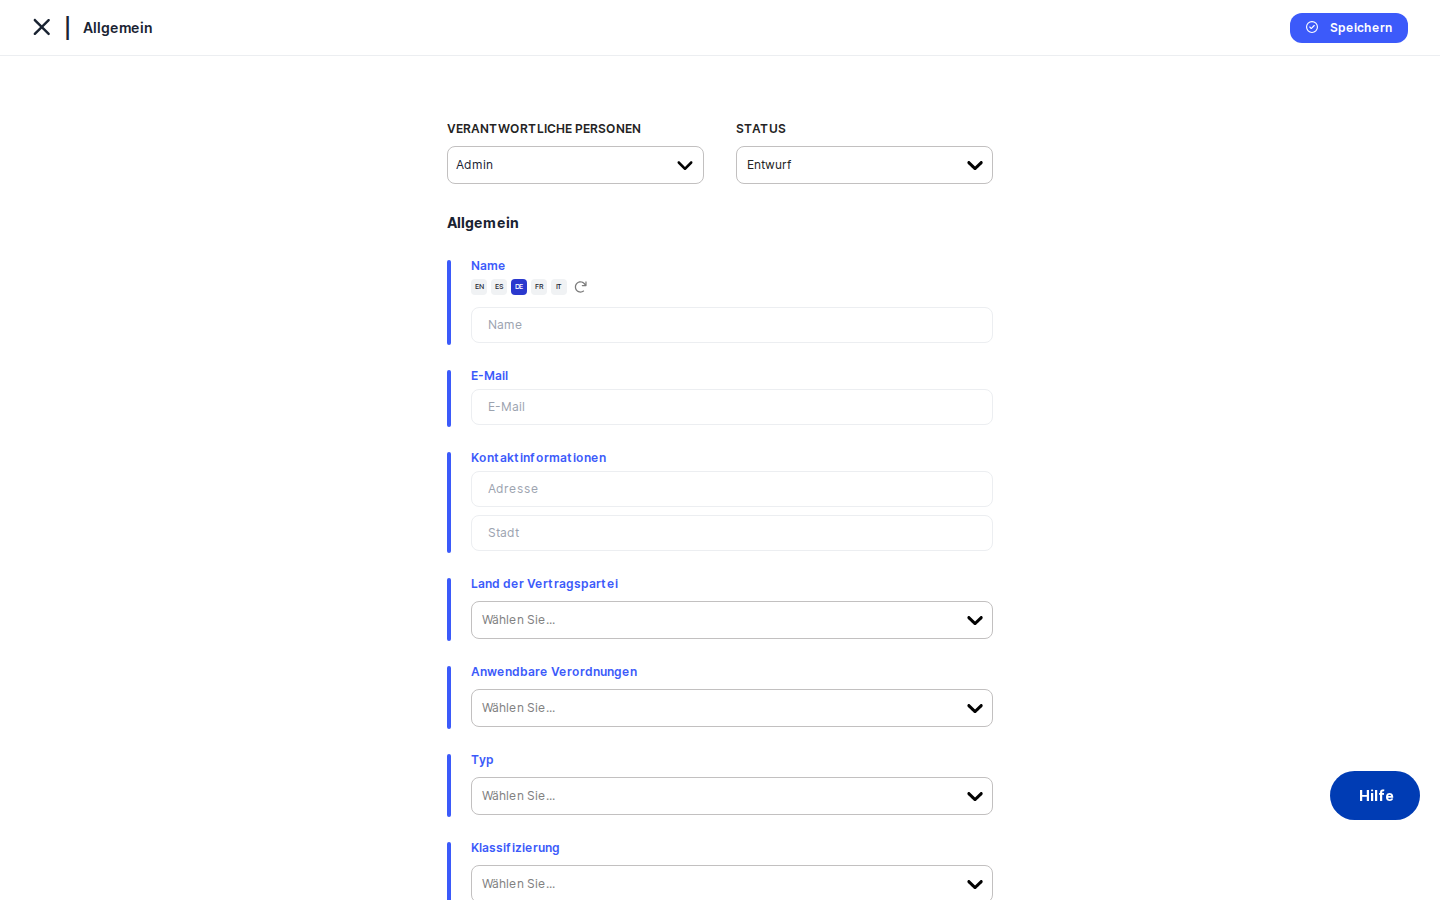
The General tab is where you document who the vendor is, where they are located, and what regulatory context applies to them. This is typically the first tab you complete when onboarding a new vendor and the one you return to when basic information changes.
- Click General in the left tree menu (or click the pencil icon on the General card in the vendor detail view).
- Fill in or update the vendor's Name. The name field supports multiple languages — if your organisation uses more than one interface language, you can add a translated name by clicking the small translate button next to the field. This button requires AI credentials to be configured in IT Settings; if it appears greyed out, those credentials have not been set up yet.
- Enter or correct the vendor's Email address. DPMS validates the format and enforces a 255-character maximum.
- Under Contact Information, fill in the vendor's street Address and City.
- Use the Country (Contracting Party) dropdown to record the jurisdiction where the vendor is based. This is labelled "Contracting Party" to distinguish it from any representative countries you document in the Representatives table further down the form.
- In the Regulations multi-select, choose all applicable data protection laws that govern this vendor's processing (for example, GDPR or UK GDPR). This list is populated from the applicable laws configured in IT Settings — if the list appears empty, ask your IT administrator to configure applicable laws first.
- Use the Vendor Type multi-select to categorise the vendor (for example, Processor, Sub-Processor, Controller). You can select multiple types.
- Assign one or more Classification tags to the vendor using the tag picker. These tags come from the "Vendor" tag group in Compliance Settings and are used for filtering and reporting.
- In the Description rich text field, write a brief overview of what services the vendor provides. This helps auditors and new team members understand the vendor's role at a glance.
- In Reason for Sharing, document why your organisation shares data with this vendor. This is particularly important for Article 28 documentation.
- If the vendor has legal representatives in specific EU/EEA jurisdictions (required for vendors established outside the EEA under GDPR Article 27), add them in the Representatives table. Each row requires both a country and an address — rows with only a country but no address will not be saved.
- Set the DPO Contact toggle to Yes if the vendor has a designated Data Protection Officer, then fill in the DPO's name, email, and phone number.
- Toggle on Contract Duration and select an expiry date if the vendor has a fixed-term contract. When you toggle this off, the contract duration is cleared from the record.
- Click Save. A toast notification confirms the save. Because you are editing an existing vendor (not creating a new one), you stay on the edit screen — the page does not navigate away.
Heads up: If you filled in a Representatives row but only selected a country without entering an address, that row will appear in the form but will silently be dropped from the save payload. Always fill in both fields before saving, then verify the row persists after a page reload.
Setting or updating criticality ratings
The Criticality tab is where you record how important this vendor is to your organisation. These ratings feed directly into risk dashboards and any compliance report that aggregates vendor risk scores across your portfolio.
- Click Criticality in the left tree menu.
- Set Material Impact to reflect the financial or business consequence if this vendor were to fail or cause a data breach. Choose from Low, Medium, High, or Critical. The field defaults to Medium if you do not change it.
- Set Criticality of Service to reflect how essential the vendor's specific service is to your core operations. A vendor may be operationally critical even if its financial impact is low — for example, a small SaaS tool that a key business process depends on.
- Set Overall Criticality to a consolidated rating that takes both of the above dimensions into account. This is the value that typically surfaces in executive dashboards.
- Click Save.
Once saved, the Overall Criticality rating will immediately be reflected on the vendor detail view and will flow into any aggregated risk reports configured in your DPMS instance.
Documenting data transfer legal bases
If your organisation transfers personal data to this vendor in a country that does not have an EU adequacy decision, GDPR Article 46 requires you to document the legal mechanism that authorises that transfer. The Transfers flow is a two-step sub-flow with its own simplified navigation.
- In the left tree menu, click the Transfers section. The main tree menu is temporarily replaced by a two-item menu: Vendor Selection and Legal Basis for Transfers.
- On the Vendor Selection tab, confirm that the receiving vendor (the entity data is transferred to) is already listed. If it is not, add it using the linked objects table. Note that the current vendor is excluded from the selectable list — you cannot link a vendor to itself. Click the save control when your selections are complete. If you remove all linked transfer vendors, DPMS returns you to the vendor detail view.
- Once at least one transfer recipient is linked, the Legal Basis for Transfers tab becomes active. Click it.
- You will see one section for each linked transfer recipient, showing the vendor's name and country. Use the Legal Basis dropdown in each section to select the applicable transfer mechanism (for example, Standard Contractual Clauses, Adequacy Decision, or Binding Corporate Rules).
- Click Save.
Heads up: The Legal Basis for Transfers tab is greyed out and cannot be clicked until you have added at least one transfer recipient on the Vendor Selection tab. This is the most common source of confusion for first-time users.
Heads up: If some of this vendor's transfers were shared into your organisation from a parent organisation (via DPMS organisation sharing), those transfer rows will not appear here for editing. They are managed exclusively by the originating organisation.
Restricting who can see or edit the vendor record
The Manage Access tab lets you control which internal user groups have access to this vendor record, independently of their global DPMS role permissions. Use this when a vendor record contains sensitive contract terms or commercially sensitive information.
- Click Manage Access in the left tree menu.
- In the groups dropdown, search for and select the internal user groups that should have access to this record (for example, "Legal Team" or "Procurement").
- Remove any groups that should no longer have access by deselecting or removing them from the list.
- Click Save. DPMS confirms the update and navigates you back to the vendor detail view.
Linking related records: tasks, assessments, documents, and assets
Several tabs — Tasks, Assessments, IT Security, Data Protection Risk, Documents, and Assets — work the same way: they show a searchable table of records already linked to this vendor, and they let you add or remove links.
- To add a linked record, use the search or add control within the table and select the record you want to link.
- To remove a linked record, use the checkbox or the action menu on that row.
- Each linked row is clickable and will navigate you to the full detail view of that record (for example, clicking a task row opens the task detail).
The IT Security tab shows only assessments in the Information Security domain, while the Data Protection Risk tab shows only Data Protection domain assessments. The Assessments tab shows all linked assessments across all domains.
Running a risk evaluation workflow
The risk evaluation tabs — Standards, Threshold, Risk Scenarios, Implemented TOMs, Determine Current Risk, Suggested TOMs, Treatment Plan, and related tabs — form a structured workflow that walks you through a full risk assessment for this vendor under one or more risk standards.
- Start with the Standards tab to associate the vendor with one or more risk standards (for example, a custom privacy risk model configured in your DPMS instance). Without at least one standard, the downstream risk tabs have nothing to evaluate.
- Move to Threshold to set the acceptable risk level for this vendor under the selected standard.
- Use Risk Scenarios to link or create the risk scenarios relevant to this vendor.
- Work through Implemented TOMs, Determine Current Risk, Suggested TOMs, and Treatment Plan in sequence to document controls, assess residual risk, and create a formal treatment plan.
- Use View Treatment Plan to review the finalised plan, and View Deadline to track treatment deadlines.
A contextual bar above the risk tabs always shows the currently selected standard and the vendor name, so you always know which risk standard you are working within.
Triggering a workflow
The Trigger Workflow tab lets you initiate a formal structured workflow against this vendor — for example, an annual review workflow that routes through reviewers and approvers. This tab is only visible if you have the workflow assignment permission.
- Click Trigger Workflow in the left tree menu.
- Select the workflow template you want to use from the list of available configurations.
- Save your selection. The workflow is initiated and will appear in the Workflow Overview tab.
Use the Workflow Overview tab to monitor the progress of active workflows, take required actions (approve, complete steps), or cancel a workflow if needed.
Reassigning the responsible person or changing the status
The Responsible Person selector and Status dropdown are always visible in the sticky header at the top of the screen, regardless of which tab is active.
- To reassign the vendor, click the Responsible Person selector and choose one or more internal users. This change is saved immediately without needing to click Save.
- To change the vendor's workflow status (for example from Draft to Active), use the Status dropdown. This is also saved immediately. Custom statuses defined in Compliance Settings appear alongside the built-in statuses.
Both fields are disabled when the Time Machine historical snapshot feature is active.
Field reference
The following fields on the General tab have validation rules or non-obvious behaviour worth knowing:
- Name — Multi-language text field. No explicit required validation, but leaving it blank will result in an unnamed vendor in all lists and reports. Supports AI auto-translation if AI credentials are configured.
- Email — Must be a valid email address including a top-level domain. Maximum 255 characters. Not required.
- Address / City — Free text. No validation. Used for GDPR Article 30 documentation.
- Country (Contracting Party) — Single-select from a country list. Displayed in your interface language.
- Regulations — Multi-select from applicable laws configured in IT Settings. If the list is empty, no applicable laws have been configured yet.
- Vendor Type — Multi-select. Options come from your organisation's vendor type configuration.
- Classification — Tag picker using the "Vendor" tag group from Compliance Settings › Tags.
- DPO Contact Email — Same validation as the main email field (valid format, 255-character maximum).
- Contract Duration — When toggled on and no date was previously set, the current date is used as a default starting point. Toggling off sets the date to null on save.
- Representatives — Both country and address must be filled for a row to be saved. A trailing empty row is always shown for adding new entries; it will not be saved.
The Criticality tab fields (Material Impact, Criticality of Service, Overall Criticality) all default to Medium if left unchanged.
How this connects to the rest of DPMS
The vendor edit screen sits at the hub of the vendor module's workflow. Changes you make here ripple through the entire system:
- ROPAs reference vendors as processors. A vendor without a correct country, type, or regulation will appear incomplete in ROPA processor lists.
- Risk dashboards consume the Overall Criticality and risk scenario data set on this screen. Without a criticality rating, the vendor will not be correctly weighted in portfolio risk views.
- Assessments (both IT Security and Data Protection domains) are linked here. Removing an assessment link from this screen also removes it from the vendor's compliance profile.
- Workflows triggered here use templates configured in the Workflow Settings area of DPMS. If no templates appear in the Trigger Workflow tab, ask your administrator to configure workflow templates.
- AI translation on the Name, Description, and Reason for Sharing fields requires AI/LLM credentials to be configured in IT Settings → AI Provider.
- Applicable laws in the Regulations dropdown come from IT Settings → Applicable Laws.
- Classification tags come from Compliance Settings → Tags (Vendor type). If no vendor tags are defined there, the Classification field will be empty.
- Custom statuses in the Status dropdown come from Compliance Settings → Statuses (Vendor Status type).
After completing the General and Criticality tabs for a new vendor, the recommended next steps are: (1) link the vendor to the relevant ROPA records, (2) set up the risk standard and risk scenarios if a risk evaluation is required, and (3) link any existing assessments, tasks, or documents.
Tips & common pitfalls
Tip: Use the left and right chevron arrows in the breadcrumb bar to move quickly between vendors when you are reviewing or updating a batch. You do not need to go back to the vendor list each time.
Heads up: Saving the General tab on an existing vendor does not navigate you away from the screen. The save is confirmed by a brief toast notification in the corner. Many users click Save again because nothing appears to have changed — rest assured, the record was saved the first time.
- Time Machine disables all editing. If someone has activated the Time Machine historical snapshot view and then navigated to the edit screen, every input will appear active but nothing can be changed. The Save button is hidden and header controls are disabled. Check whether Time Machine is indicated in the breadcrumb.
- Representatives need both a country and an address. A row with only a country selected and no address will appear in the form but will be silently dropped when you save. After saving, reload the page — if the row is gone, you need to re-enter both fields.
- The Legal Basis for Transfers tab is locked until a recipient is added. If you cannot click the Legal Basis tab, it is because the Vendor Selection tab has no linked transfer recipients yet. Add at least one recipient first.
- Concurrent edits are detected. DPMS tracks changes using an internal record identifier that updates on every save. If two people open the same vendor and one saves first, the second user will receive a warning when they try to save. Reload the record and re-apply your changes to avoid overwriting someone else's work.
- Shared transfers are read-only here. Transfers that were linked to this vendor through an organisation group sharing arrangement are not editable on the Legal Basis for Transfers tab. Only transfers created directly within your organisation can be edited here.