
General Settings
The General Settings screen is the single place in DPMS where your organisation's legal identity and data protection responsibilities are defined. Everything from automatically generated privacy notices and Records of Processing Activities (RoPA) to data subject correspondence pulls the DPO's contact details and the company's registered address from what you enter here. If these fields are empty or out of date, documents produced by DPMS will be incomplete — so this is one of the first screens to configure when onboarding, and one of the first to revisit after any personnel or company change.
How to open it
In the main sidebar, go to Compliance Settings → General. This is the default landing page for the Compliance Settings section and is always the first item in the left-hand menu.
You need read access to Compliance Settings to view this screen. If your role does not include that access, you will see a "Forbidden" page. To make changes, you additionally need edit access to Compliance Settings — without it, you can read everything on the screen but the Edit button will appear greyed out with a tooltip explaining the restriction.
What you see
The screen is divided into two areas. On the left sits the Compliance Settings navigation menu, with General highlighted as the active item. The other items in the menu (Tags, Statuses, and other compliance configuration sections) let you jump between related setup screens without navigating away.
On the right is the General settings card, headed "General," with the Edit button in the top-right corner of the card. Below the heading, all configured values are displayed in a clean two-column list: a muted label on the left, the stored value on the right. Filled-in values appear in blue so they stand out at a glance; empty fields show a dash.
The card is visually split into two labelled sub-sections: Data Protection Officer (DPO name, deputy, contact details, and DPO address) and Data Controller (company name, registered address, CEO, and legal links). This separation matters — both sections contain fields called "Street," "Postal Code," "City," and "Country," so the section heading is the only visual guide telling you which address you are looking at.
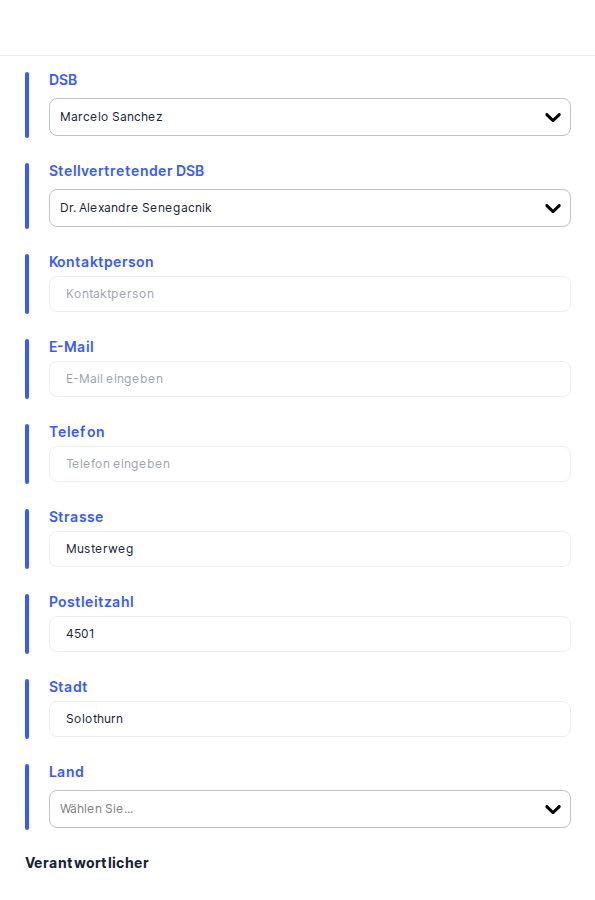
When you click Edit, the left menu disappears and the screen centres a tall form card with a blue left-border accent, making it clear you are in editing mode. A back arrow in the top-left corner lets you cancel without saving.
Working with this screen
Setting up your organisation for the first time
When DPMS is freshly installed, all fields show dashes — nothing has been configured yet. A compliance officer or DPO typically completes this screen as part of initial onboarding before working in any other part of the platform.
- Click
Editto open the edit form. - In the Data Protection Officer section, click the
DPOpicker and search for the person in your user directory who holds the DPO role. Select them. If you have a deputy, do the same in theDeputy DPOpicker. - Fill in the DPO's contact details:
Contact Person(if there is a named assistant or team contact),Contact Email,Contact Phone, and the DPO's address (Street,Postal Code,City,Country). - Scroll down to the Data Controller section. Enter the company's full legal name in
Company, a shortCompany Description, the registered address fields, theCEOname, theImprint Link, and thePrivacy Policy Link. - Click
Save. A success notification confirms the changes. The company name updates across the entire platform immediately — you will see it reflected in the page header without needing to reload.
Heads up: Both theDPOandDeputy DPOpickers default to the currently logged-in user if no one has been set before. Always check these fields before saving — an administrator who opens the form and clicksSavewithout reviewing them will accidentally register themselves as DPO and Deputy DPO.
Updating the DPO after a personnel change
When your organisation's DPO leaves or the role changes hands, the record in DPMS must be updated promptly. Until it is, any auto-generated document — privacy notices, data subject responses, processing records — will still name the former DPO.
- Go to Compliance Settings → General and confirm the current DPO shown in the read-only view.
- Click
Edit. - In the
DPOpicker, clear the current name and search for the new DPO's account. Select them. - Update
Deputy DPOif that has also changed. - Update
Contact EmailandContact Phoneto the new DPO's details. - Click
Save. From this moment, every document and notification generated by DPMS will reference the new DPO.
Correcting legal links after a website redesign
If your company's website has been relaunched and URL paths have changed, the privacy policy and imprint links stored in DPMS need updating before the next batch of documents or privacy notices is generated.
- Open Compliance Settings → General and click
Edit. - Scroll to the Data Controller section.
- Replace the value in
Privacy Policy Linkwith the new full URL (includinghttps://). Do the same forImprint Linkif that page has moved. - Click
Save. All future DPMS-generated documents and privacy notices will embed the updated links.
Tip: There is no URL format validator on these two fields — DPMS will save any text you enter without checking whether it is a working web address. Always paste the URL into a browser tab to confirm it resolves correctly before saving.
Reviewing the DPO details as an auditor
If you have read access but not edit access, you can still use this screen to verify the organisation's current DPO and legal contact information for an audit report.
- Navigate to Compliance Settings → General.
- The read-only view shows all configured values — DPO name, deputy, contact email, company name, registered address, CEO, and legal links.
- The
Editbutton is visible but greyed out. Hovering over it shows a tooltip confirming you do not have permission to make changes. - You can read and copy any of the displayed values for your report.
Field reference
DPO — The named Data Protection Officer for your organisation. Selected from the DPMS user directory. Appears in privacy notices, processing records, and DPO-related automated correspondence. Defaults to the logged-in user if never previously set.
Deputy DPO — The backup DPO who acts when the primary DPO is unavailable. Used in workflow notifications and approvals that involve the DPO role. Defaults to the logged-in user if not previously set.
Contact Person — A free-text name for the DPO team's main point of contact (for example, a personal assistant or a team inbox name). Optional.
Contact Email — The email address for data protection enquiries. Must be a properly formatted email address with a valid domain and top-level domain (e.g. .com, .de, .org). Internal-only addresses without a standard TLD (e.g. dpo@company.local) will fail validation and prevent saving. Maximum 255 characters.
Contact Phone — The DPO team's telephone number. Free text; any format is accepted. Optional.
Street / Postal Code / City / Country (DPO section) — The DPO's registered or office address. Appears in legal documents where a DPO address is required. All optional, but leaving them blank will produce incomplete documents.
Company — The full legal trading name of the data controller organisation. Appears in every generated document and in the RoPA controller identification section. Strongly recommended.
Company Description — A brief description of the company's business activities. Appears in processing records. Optional.
Street / Postal Code / City / Country (Data Controller section) — The company's registered legal address. Separate from the DPO address above. All optional but important for legally complete documents.
CEO — The Chief Executive Officer's full name. Required in many EU privacy imprints and data processing agreements. Optional in the form but strongly recommended for legal completeness.
Imprint Link — The full URL to your company's legal imprint page (often called "Impressum" in German-speaking jurisdictions). Embedded in auto-generated privacy notices. No URL format validation — any text is accepted, so double-check the link is correct.
Privacy Policy Link — The full URL to your published privacy policy. Embedded in privacy notices, data subject request forms, and cookie consent materials generated by DPMS. Same validation caveat as Imprint Link.
How this connects to the rest of DPMS
The information you store here is the backbone of DPMS's document generation. The DPO name and contact email flow into data subject request correspondence — when DPMS sends a notification to a data subject, it cites the contact details from this screen. The Data Controller name and address appear in the controller identification block of every RoPA entry. The Privacy Policy Link and Imprint Link are embedded in auto-generated privacy notices and cookie consent banners.
When you save changes here, DPMS also updates the company name and identity immediately across the entire platform — the Redux auth store is refreshed, so any screen that displays the organisation's name reflects the new value without you needing to reload the browser.
After completing General Settings, a typical next step is to work through the other items in the Compliance Settings left-hand menu — Tags and Statuses — and then move on to setting up your Records of Processing Activities and Privacy Notices, both of which will now automatically carry the correct DPO and company details you have just entered.
Tips & common pitfalls
Heads up: Both person pickers (DPO and Deputy DPO) default to the currently logged-in user if the fields have never been set. An admin who opens the edit form for the first time and clicks Save without reviewing these will accidentally assign themselves as the organisation's DPO. Always verify these two fields before saving.Heads up: There is no "unsaved changes" warning. If you click the back arrow while editing, all your edits are silently discarded. There is no confirmation dialog. If you accidentally navigate away, you will need to re-enter your changes from scratch.
- Two address sections, same field names. Both the DPO and Data Controller sections contain fields labelled "Street," "Postal Code," "City," and "Country." It is easy to fill in the wrong address in the wrong section when scrolling quickly. Use the section headings as your guide.
- The Contact Email field uses stricter validation than most. Standard browser email validation is not enough here — DPMS checks that the email address has a proper public domain and top-level domain. Addresses like
dpo@company.localwill be rejected. Use a publicly valid email format. - No URL validation on Imprint Link or Privacy Policy Link. DPMS will save any text in these fields — including a partial URL or a typo — without any error. A broken link stored here will appear broken in every privacy notice the platform generates. Paste the URLs into a browser to verify them before saving.
- The company name updates immediately platform-wide. After a successful save, the company name shown in the platform header changes at once. This is intentional — it is not a display glitch.
Tip: Use the changelog drawer (the clock icon in the breadcrumb bar, visible when reviewing records elsewhere in DPMS) to audit who last changed the General settings and when — a useful reference during an external audit or regulatory inquiry.